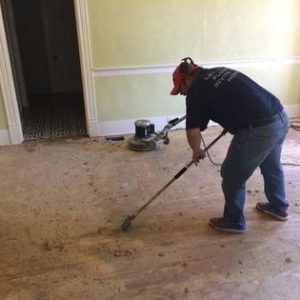
Installing hardwood flooring can transform the look and feel of your home, but it requires a proper subfloor preparation to ensure that the installation is successful. A poorly prepared subfloor can lead to uneven floors, squeaks, and other issues. In this blog post, we will provide you with a comprehensive DIY guide to preparing your subfloor for a successful hardwood flooring installation.
Step 1: Inspect and Repair the Subfloor
The first step in subfloor preparation is to inspect the subfloor for any damage, squeaks, or unevenness. You can use a level to check the subfloor for any dips or high spots. If there are any noticeable issues, such as dips or high spots, it is recommended that you fix them before proceeding with the installation. You can use a leveling compound to level out any dips or high spots. If there is any damage to the undersheeting you will want to replace that. If the sheeting is loose, tighten the sheeting to the joist with decking screws.
Step 2: Clean the Subfloor
Once you’ve addressed any issues with the subfloor, it’s time to clean it. Check the floor for any nails or screws sticking up. If your subfloor is a concrete slab, you’ll want to remove any adhesive or glue by scraping or grinding. Remove any debris, dirt, or dust using a vacuum cleaner or broom. Ensure that there is no moisture on the subfloor before proceeding with the installation. A damp subfloor can cause issues with the hardwood flooring later on, such as warping or cupping. Engineered floors will separate and peel.
Step 3: Install a Moisture Barrier
Installing a moisture barrier is an essential step in subfloor preparation. A moisture barrier prevents moisture from seeping into the hardwood flooring, which can cause warping or cupping. You can use a specialized moisture barrier product or a plastic sheet. Make sure to cover the entire subfloor with the moisture barrier and follow the manufacturer’s instructions. We recomend Aquabar B waxed underlayment. for wooden or cork underlayment. While we prefer to roll on Wakol PU280 for concrete slabs.
Step 4: Acclimate the Hardwood Flooring
Before installing the hardwood flooring, you need to acclimate it to th
e room’s temperature and humidity. Place the hardwood flooring in the room where it will be installed and let it sit for at least 48 hours. This step ensures that the hardwood flooring adapts to the room’s environment, which can reduce the risk of warping or cupping.
Step 5: Lay your flooring out
We recommend that you lay your flooring out prior to anchoring your flooring with nails, cleats, or staples. You’ll want to avoid “H” patterns, double joints (two different rows that the joining width joints are the same ) and staircase patterns as well. This will also allow you to pre-cut your end pieces and use the cut offs to start your next row, increasing efficiency and cutting down on waste.
Step 6: Ensure You Have Good Lighting
When looking at a floor it is easy to get lost in the field (central area, unbroken by walls, door casings etc.). Sufficient lighting to see gaps, pattern issues, and things that might cause other complications, such as a nail or staple under a board, can help eliminate problems before they get too tedious to fix. We recommend a mix of natural and artificial light. A bright shop or drop light can also help when prepping and installing your floor.
Final Step: Prepare Your PPE
As with any DIY home improvement project, Personal Protective Equipment is vital to staying safe. Even when prepping a hardwood floor PPE should be worn. Hand and Eye protection like gloves and safety glasses as well as respirators or dust masks are a given but you might also consider hearing protection or even earbuds when using equipment like screw guns, saws and flooring nailers. An updated first aid kit should also be accessible while working on your floor.


